Tonight I will be moving my VCSA server to my Administration VLAN from my general internal server VLAN. I will also be changing the hostname to be more consistent with my scheme and IP address of the server so it can route on my Administration VLAN. There’s plenty of guides out there about doing this, but some flat out don’t work or are overtly complex. Let’s get started!
Configure VCSA DNS Records
First, I needed to create new A and PTR records for the new VCSA server. I’m using Microsoft Active Directory, so I opened DNS Manager on my jumpbox and created a new A record corresponding to my new hostname. Since I already have a reverse lookup zone, the PTR record was automatically created and I verified it existed.
Mitigate Potential Risk
With that out of the way, I logged on to the existing VCSA Server and cloned it. This allows me to cleanly change the name of the virtual machine inside vSphere, change the VLAN, and if anything were to go wrong, I just trash it and fall back to the old one. I gave it a name that corresponds to my new hostname and placed it on my Administration DSwitch.
Configure VCSA Network Settings
After it was finished cloning, I booted the VM. VCSA seems to get REALLY (and I mean REALLY) angry if you attempt to change the IP and hostname from the console. To remedy this, I dropped down to a bash shell by pressing ALT + F1 at the same time and logged in as root.
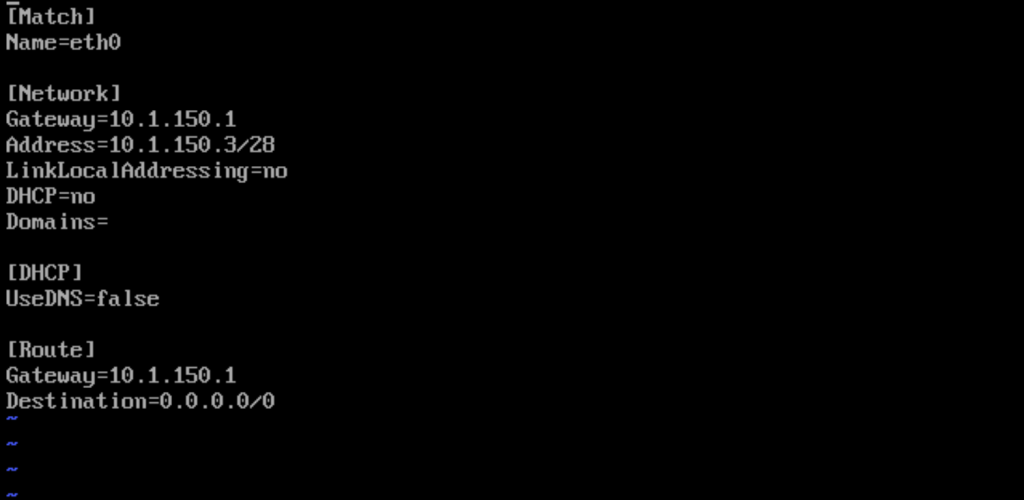
Once I was logged in, I modified my network adapter to reflect the new IP:
// Edit network configuration
vi /etc/systemd/network/10-eth0.network
// Save the file and exit vi
// Press ESC on keyboard
wq!
// Press Enter
Then reboot the server:
// Reboot server, Force
reboot -f
The VCSA server rebooted and my IP address was changed! I opened up a web browser and navigated to the web administration console:
// Navigate to VCSA Web Administration Console
https://YOUR_VCSA_IP:5480
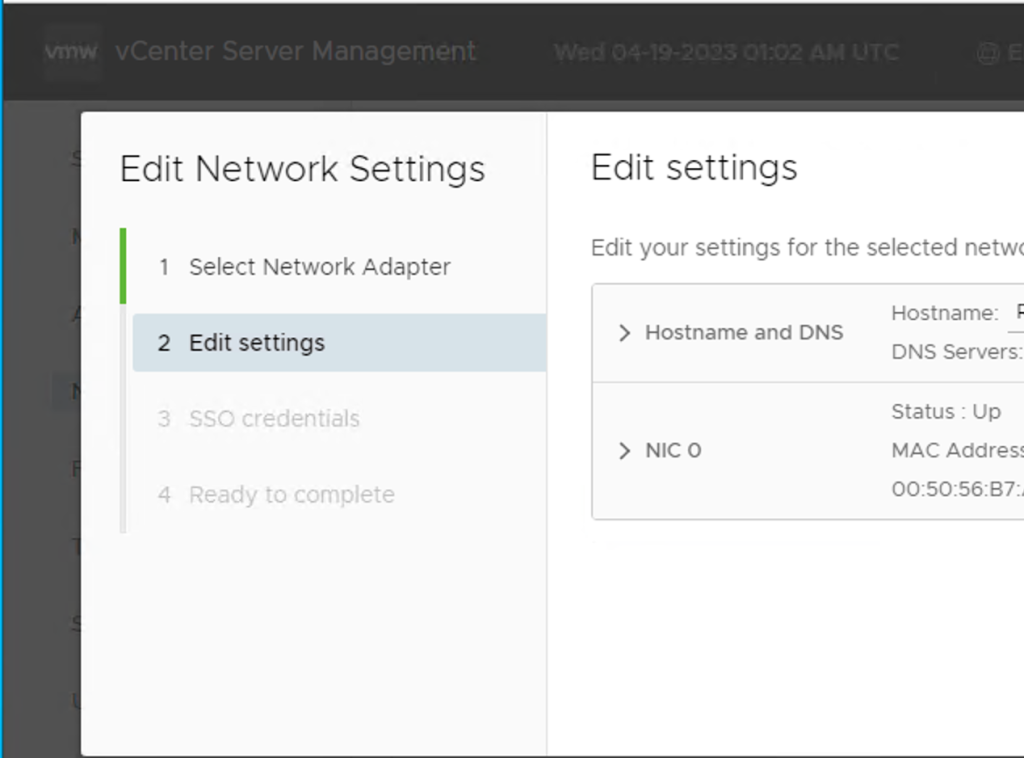
Login using root credentials and click “Networking” on the sidebar then click “Edit” in the upper right hand corner.

Expand “Hostname and DNS” and change the hostname. I did not change my domain name extention, so I left that in place. Click next and enter the [email protected] username and password. Click next and let it change the hostname and restart services. This takes a good 15-20 minutes. Grab a coffee and let it think.
Conclusion
I received no errors, and I was able to resolve my server by its DNS name! I powered down my old VCSA server and left it in place to scream test this setup. In a couple of days, I will delete the original VM and DNS records. Be sure to check out my other posts!


wj3ksa
qzujxw
xbltkf
05ugqy
9jahh8
f2qert
srwzej
4f3f60
e9vn80
198ya5
07dqdc
g0x21g
9jidok
5rots2
oyl3ww
owvfu0
gtugvy
c6c12v
1e38t7